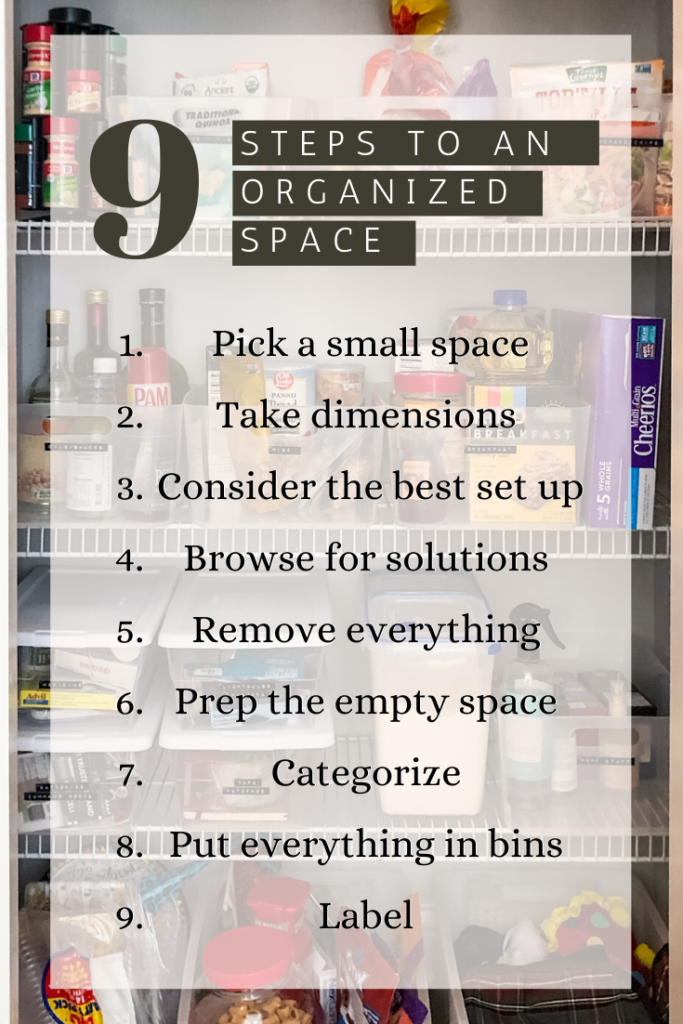
If you’ve been following my Instagram stories, you know I’ve been spending my weekends purging crap from the darkest corners of our house. (And we’ve not even lived there a year!) I took 2020 by storm and have already completely reorganized our pantry, junk drawer, bathroom drawers, the cabinet under our kitchen sink, our basement storage room and my craft room. Check my Instagram highlights to see my progress. My list is never-ending, but it sure feels good to cross those spaces off my list.
Before I get into this post let me just start off by saying I am not an organized person, but I have gotten better with age. In high school I was a borderline hoarder. It wasn’t until I started living on my own and having to deal with my own junk when I started to appreciate the bliss that is labeled bins. But I still really only bother to organize once a year. And I know that a New Year is just a facet of the human imagination, but hey, if it helps get my butt in gear, I’m here for it.
For me, I find that the hardest part of organizing is getting started. It seems like such a daunting task, but it’s always so much easier and quicker than it seems if you set out with simple, manageable goals. Below I’ve broken out my process for organizing. I’m sure there are loads of articles about this on the Internet, but these easy steps have worked well for me (and my anxiety.)

I’ve broken my process down into two days, and each of these tasks takes less than a few minutes.
Day one:
Day one involves picking your space, prepping and purchasing your organizational items.
1. Pick an Area to Organize: Start Small
If you’re like me, I’m sure you have a running list in your head of all the areas in your home that: are a mess, need cleaned, need organized, need updated, etc… Dump all of these in a notepad and focus only on the organization category. Then, focus on one area. And when I say one area I don’t mean the kitchen. I mean, that one drawer in the kitchen. Or the pantry. Keeping your area as small as possible will help you feel productive and not overwhelmed.
2. Take Dimensions of Your Space
Once you’ve decided on your small area, whether that’s a drawer, pantry, closet or cabinet, measure the entire space and write down your dimensions.
3. Brainstorm your Ideal Setup
Take a moment to think about the items you need to store in the space and how best to store them. For example, will it be easiest to access my items if they’re stored vertically or horizontally? Do I need smaller compartments for more granular organization or larger bins for similar items?
A tip here, even if you can fit all of your items within your space without any bins or drawers, there is a 100% chance you space will stay more organized if you use some kind of bins/dividers/etc. Plus, it looks better! I read that Marie Kondo recommends clients use old cardboard boxes for organizers, but I’m a sucker for a clear acrylic bin. (And that’s a sentence I never thought I’d see myself write.)
4. Browse for Organization Solutions
This step is sort of like playing Tetris. Once you have an idea of how your items would best be organized, it’s time to browse around and see what kind of solutions will fit within your dimensions. I think this is easiest if done online so you can easily find all of the product dimensions and break out your calculator if necessary.
My favorite organization destination is The Container Store, but I also like Target and Wayfair. The Container Store can be a bit more pricey, so if you find something you like there, see if Target or elsewhere offers something similar. You also might find some unique solutions that meet your needs even better than what you had in mind.
Day two:
Day two will take place sometime in the future (once your organization solutions have arrived on your doorstep.) Now it’s time to get down to business.
5. Remove Everything From the Space
I used to think this was a pointless step that I could avoid to save myself some work. DO NOT SKIP THIS STEP! Seeing the space empty will bring new inspiration and help you categorize items.
6. Prep the Empty Space
This is another reason you need to clear everything out of the space. You’ll want to completely clean it (if this is a pantry, storage room or junk drawer, it’s very likely it hasn’t been cleaned completely in years.)
Once the space is clean, there might be some extra prep work that can really elevate the space. If your area is a drawer, you should cut a drawer liner so your items don’t slide around. I also like to line the bottom of cabinets and shelves, unless you need bins to function more like drawers.
7. Categorize your Items
I usually break this step down into several steps depending on the size of the area. For example, in my pantry, I categorized items by keep, trash and donate. Then I organized the “keep” items into food and miscellaneous. Then I organized the food into more granular categories (grains, sauces, baking ingredients, etc.) I think the key here is finding items to purge. If a space needs organizing, there’s a high chance there’s some junk in there you no longer need.
8. Put Everything in a Bin
This is where it gets fun. (Writing this post is making me realize how boring I truly am.) When you put your items in your organizers, pay attention to simple things like arranging by height, etc. that can make an aesthetic difference but also help you find things faster.
9. Label!
This is the REALLY fun part. I recently purchased this retro-style black label maker and I love it. But you can also just use tape and a sharpie for this step.


